Web Development 201
Geoff Dusome • March 8
Part II: All About Semantic Code
In the second installment of our series on web development, Geoff Dusome, our senior developer, walks us through the steps of coding content for a page. (If you need a refresher, check out part one.)
First things first: What is semantic code? Semantic code helps browsers, search engines, and browser accessibility tools (text-to-speech, etc.) understand your code in a way that is meaningful to the displayed data.
Let’s begin by looking at our previous example.
https://gist.github.com/GeoffDusome/73f4788480bc7ef2ff997f733b3fff42#file-index-html
Now, let’s create a basic template for our content. I’ve used Lorem Ipsum (a type of Greek placeholder content) to fill space so things are a bit easier to understand.
https://gist.github.com/GeoffDusome/73f4788480bc7ef2ff997f733b3fff42#file-semantic-html
Understandably this is a lot to take in, so we’ll go step-by-step.
The <header> Element
A <header> element defines the beginning in a set of content. In our case, the <header> element is used to describe content within the entire document. In the <header> element, we can see an <h1> (heading) element with an <a> (link) element inside of it, followed by a <nav> (navigation) element with a <ul> (unordered list) element inside of it. A <header> element can be used within most other content tags (such as <section> or <article>) to describe the content within that section.
Headings
A heading element (<h1>, <h2>, <h3>, <h4>, <h5>, <h6>) describes a section of content. There should only be one <h1> element per page, as it should be used as the main description of the page. After that, all other heading elements should be hierarchical. For example, an <h3> element that follows an <h2> element is “nested” underneath the <h2> element and all content under the <h3> is then semantically a part of the <h2> element’s content. In our case, our <h1> element is describing the document, saying it is “My Website”.
The <nav> Element
The <nav> element is fairly straightforward. It contains a set of links that can navigate the user to a section on the same page, to other pages, or to pages on other websites. Note that there are many places to put a <nav> element. It can live within the <header> element, below it, or even inside an <article> or <aside> element.
The <article> Element
The <article> element is where we’ll place the main content of our page. The <h2> section describes a little about who we are and the <h3> tag below it describes something related to the “About Us” heading. The <article> element can contain <section> elements if you need to split up the content of the <article> even further.
The <aside> Element
The <aside> element contains the supporting content of the document. In our example, the <aside> element contains supporting content of the entire document. You can use the <aside> element within an <article> to support a section of content.
The <footer> Element
The <footer> element usually wraps up content. The footer closes the document with a copyright notice in our example. Sometimes, a <footer> element contains a menu or other supporting information for the content. For instance, you could use a <footer> element within an <article> element to denote the author of a post.
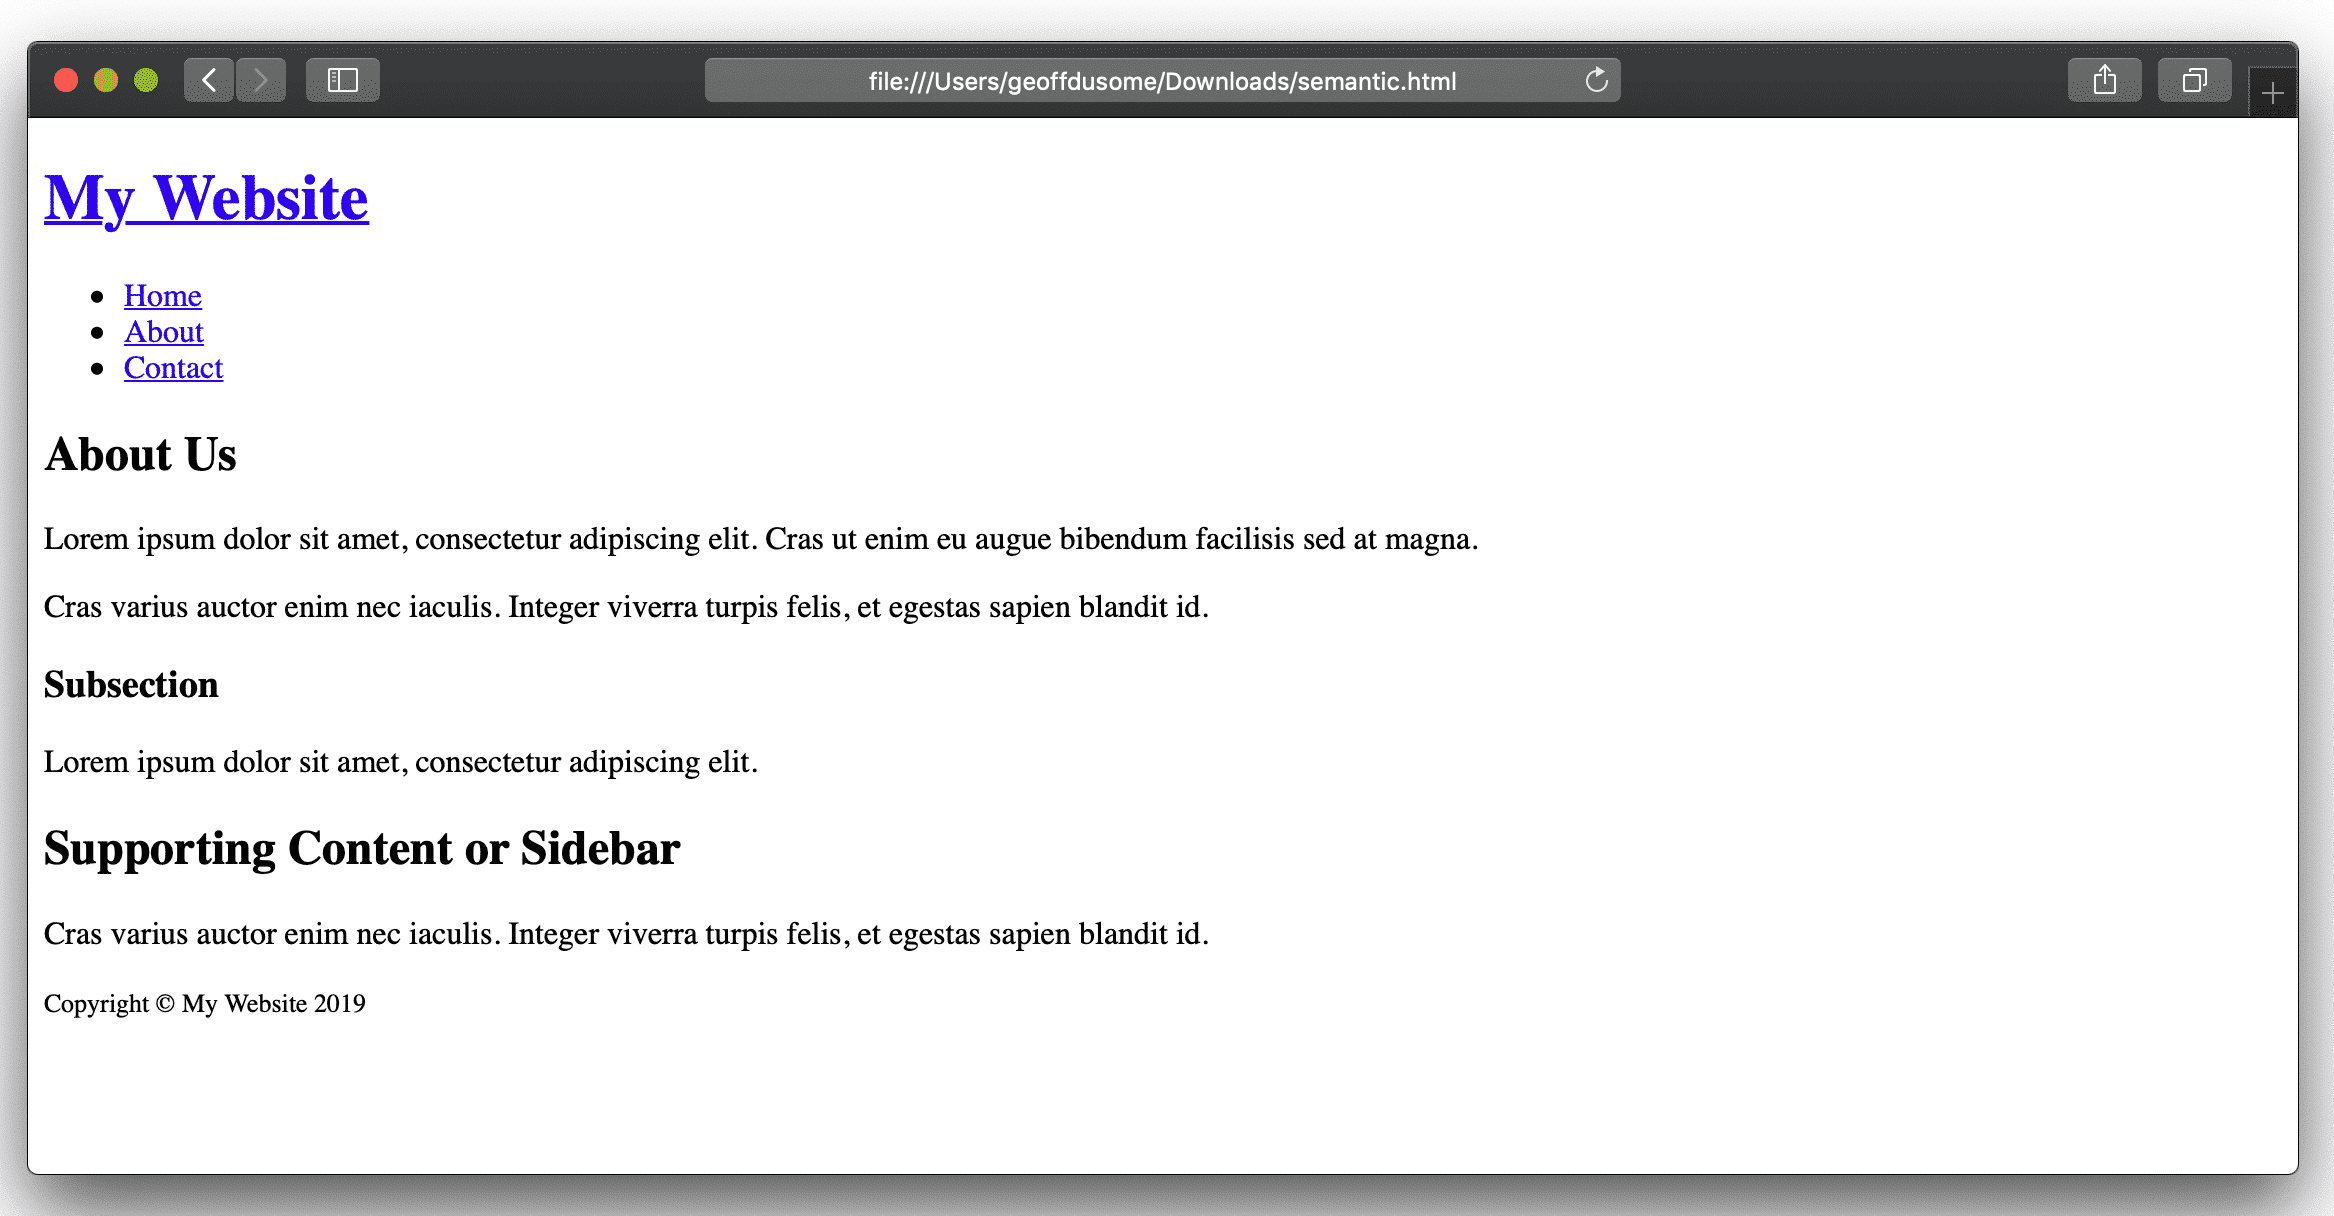
The Final Product
Still following along? If so, your work should resemble the screenshot below.
I’ve only covered a small part of a large list of the main elements you can see on the web today, so get out there and learn more! Visit here to explore additional information about writing semantic HTML.
Coming up next, in the final part of this series, we’ll start styling our document and make it look a bit more beautiful!